Difference between revisions of "IPBrick Groupware - Microsoft Outlook"
From wiki.IPBRICK.COM
(→Set up a CalDav account in MS Outlook) |
|||
| Line 26: | Line 26: | ||
2- Choose the option "calendar (on this computer only)"; | 2- Choose the option "calendar (on this computer only)"; | ||
3- Enter the DAV URL, as shown in the image below: | 3- Enter the DAV URL, as shown in the image below: | ||
| + | [[File:CaldavoutlookSogo.png|1100px]] | ||
| + | 4- Set your Username; | ||
| + | 5- Set your Password; | ||
| + | 6- Active the "Use IMAP/POP3 account password" option; | ||
| + | 7- Click on "Get IMAP/POP3 account settings"; | ||
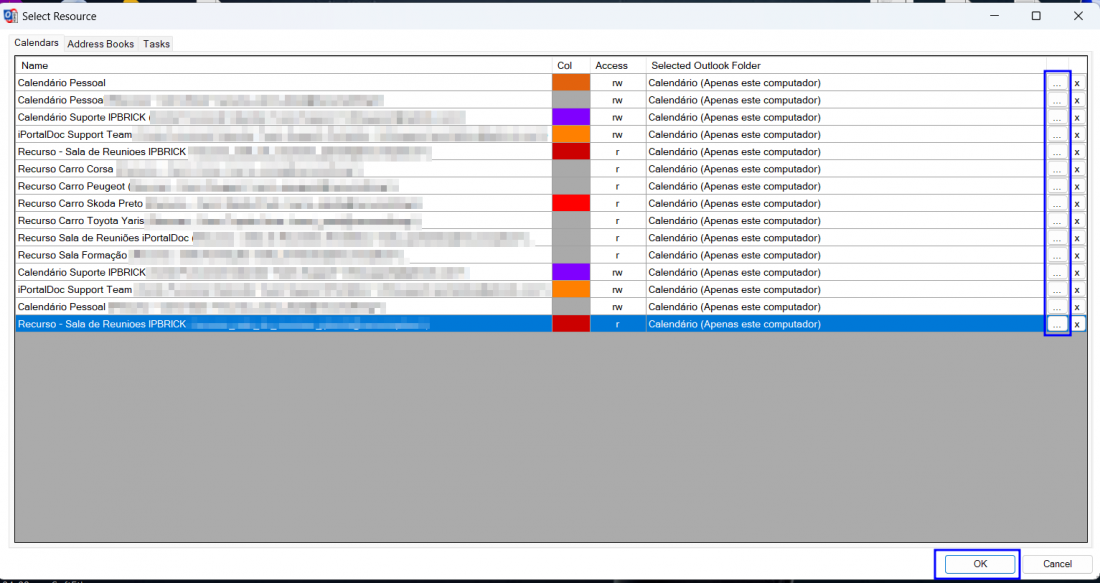
| + | 8- Click "Test or discover settings" and you will be able to select the calendar you want, as shown in the image below: | ||
| + | [[File:Caldavoutlook3.png|1100px]] | ||
Revision as of 11:20, 19 April 2024
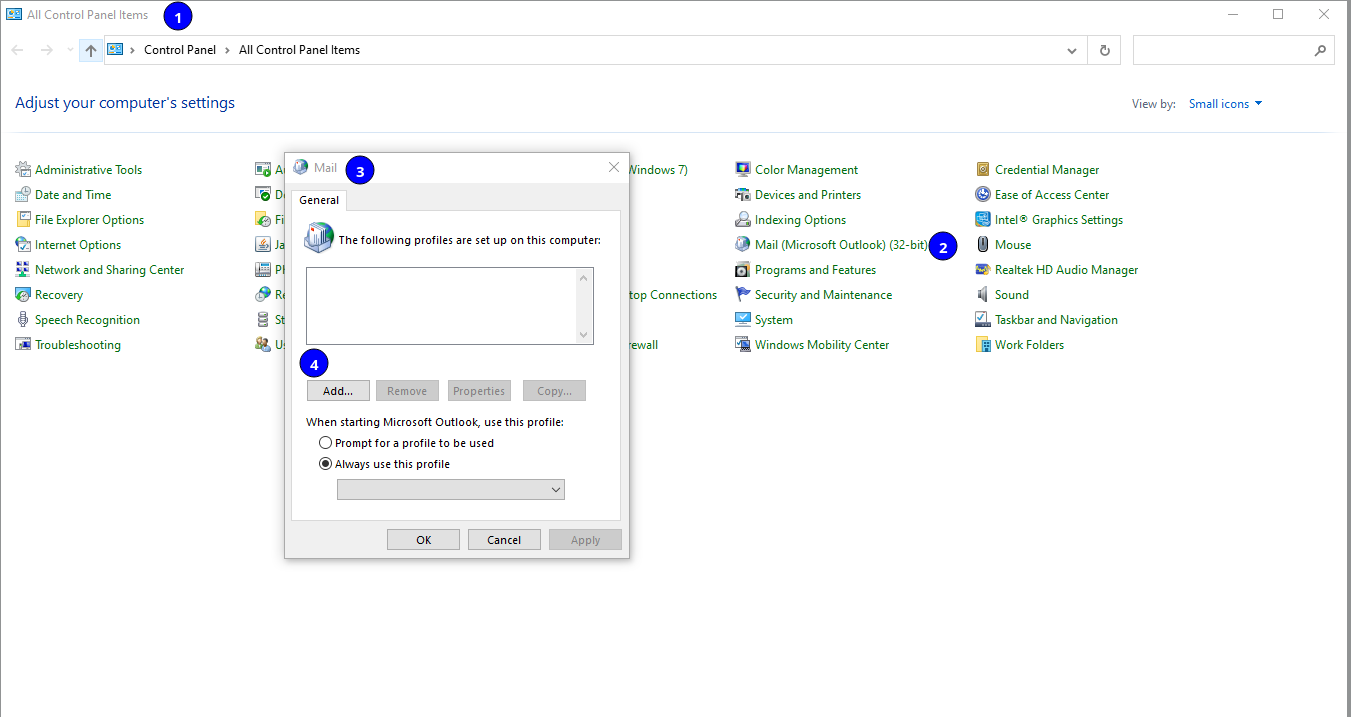
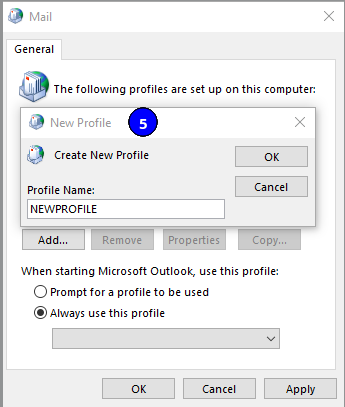
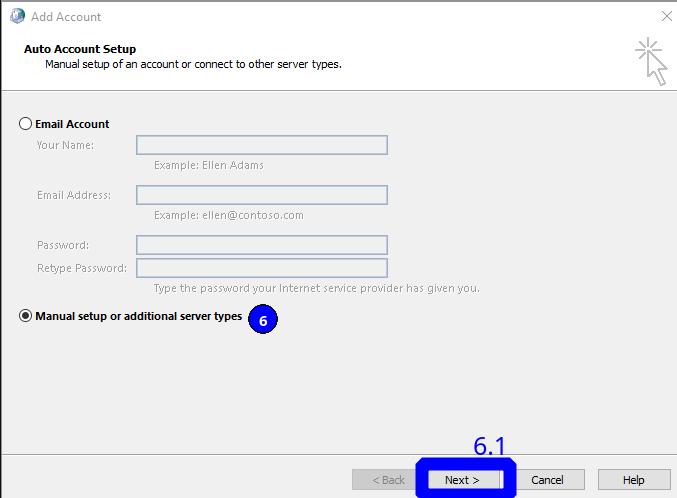
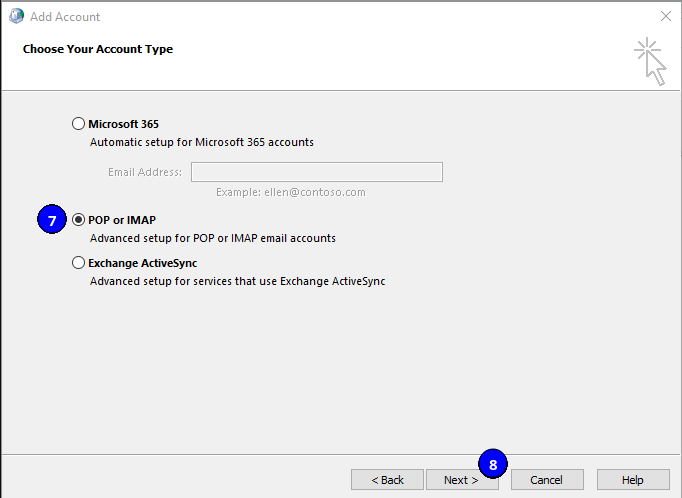
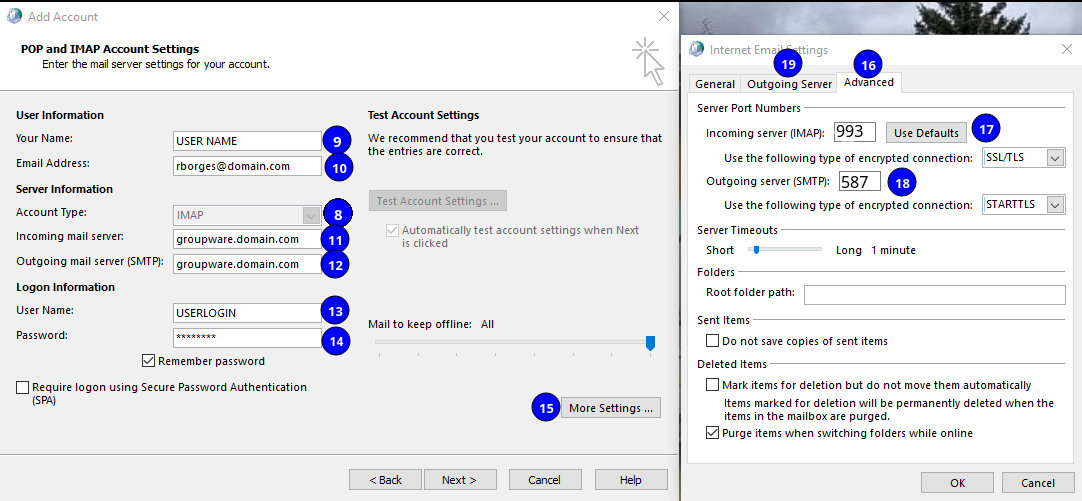
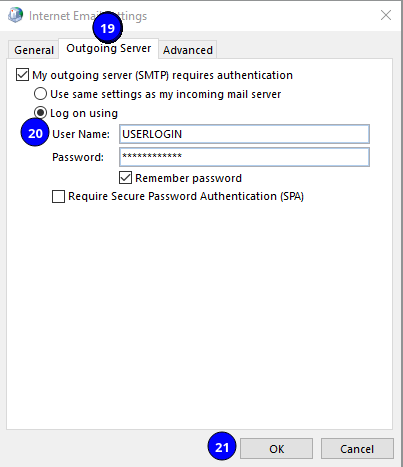
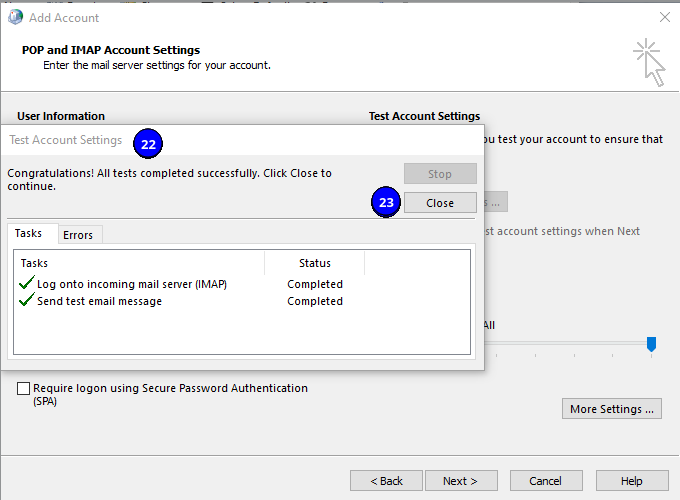
Configure an IMAP account in MS Outlook
Set up a CalDav account in MS Outlook
Search for "caldavsynchronizer download" and download, extract the file and execute the "CalDavSynchronizer.Setup".
Once done, open Outlook and click on the CalDav Synchronizer tab and then click on Synchronization Profiles.
Now do the following:
1- Put the Calendar name; 2- Choose the option "calendar (on this computer only)"; 3- Enter the DAV URL, as shown in the image below:4- Set your Username; 5- Set your Password; 6- Active the "Use IMAP/POP3 account password" option; 7- Click on "Get IMAP/POP3 account settings"; 8- Click "Test or discover settings" and you will be able to select the calendar you want, as shown in the image below:
