Difference between revisions of "IPBrick Groupware - iOS"
From wiki.IPBRICK.COM
| Line 4: | Line 4: | ||
[[File:IOS 1.PNG|350px | border]]<br> | [[File:IOS 1.PNG|350px | border]]<br> | ||
[[File:IOS 2.PNG|350px| border]] [[File:IOS 3.PNG|350px| border]]<br> | [[File:IOS 2.PNG|350px| border]] [[File:IOS 3.PNG|350px| border]]<br> | ||
| − | [[File:IOS 4.PNG|350px| border]] | + | [[File:IOS 4.PNG|350px| border]] [[File:IOS 5.PNG|350px| border]]<br> |
| − | [[File:IOS 5.PNG|350px| border]]<br> | + | [[File:IOS 6.PNG|350px| border]] [[File:IOS 7.PNG|350px| border]]<br> |
| − | [[File:IOS 6.PNG|350px| border]][[File:IOS 7.PNG|350px| border]]<br> | + | |
After entering the data shown above, the advanced settings menu will appear. <br> | After entering the data shown above, the advanced settings menu will appear. <br> | ||
| − | [[File:IOS 8.PNG|350px| border]] [[File:IOS 9.jpeg|350px]]<br> | + | [[File:IOS 8.PNG|350px| border]] [[File:IOS 9.jpeg|350px]]<br><br> |
To fill in the "Account URL" input field, you need to access IPBRICK MAIL in your browser and follow the following steps.<br> | To fill in the "Account URL" input field, you need to access IPBRICK MAIL in your browser and follow the following steps.<br> | ||
In the top bar select the calendar icon <br> | In the top bar select the calendar icon <br> | ||
Revision as of 09:49, 12 January 2024
* * How to add the IPBRICK.MAIL calendar on IOS * *
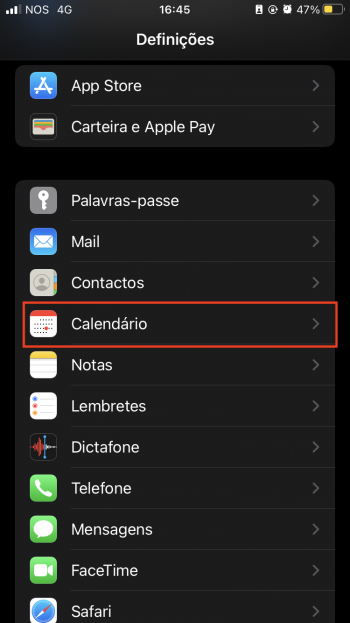
Access Phone Settings
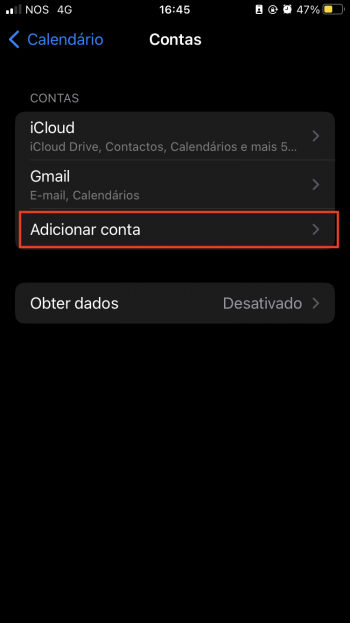
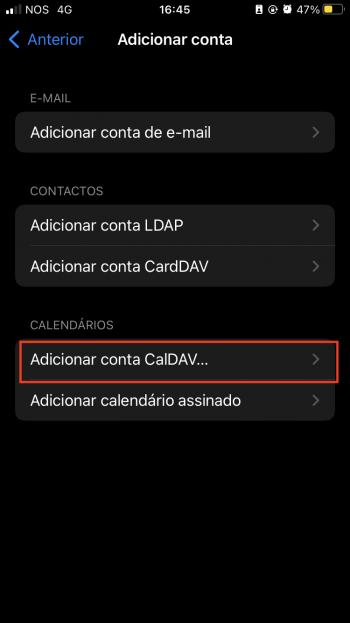
Select Calendar
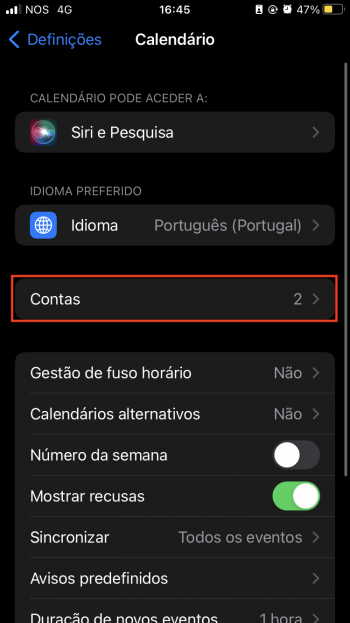
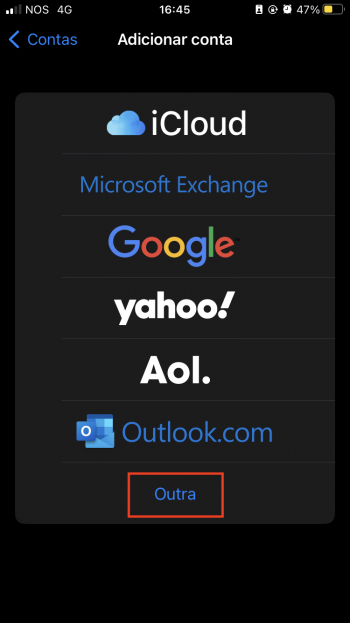
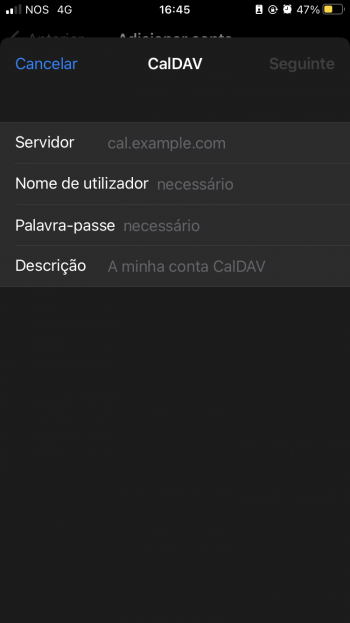
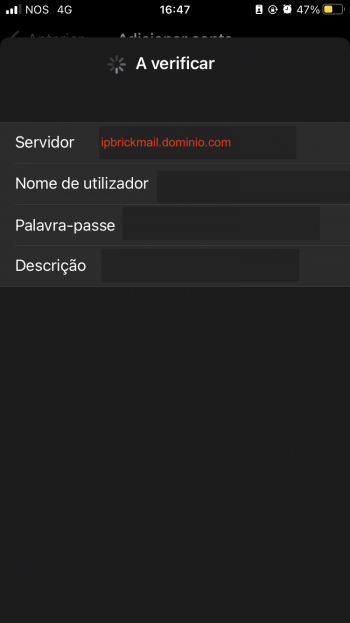
After entering the data shown above, the advanced settings menu will appear.
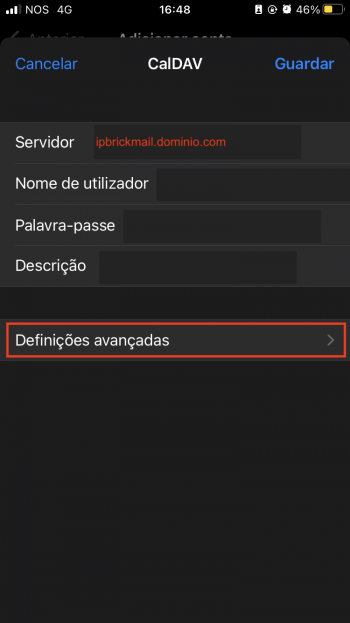
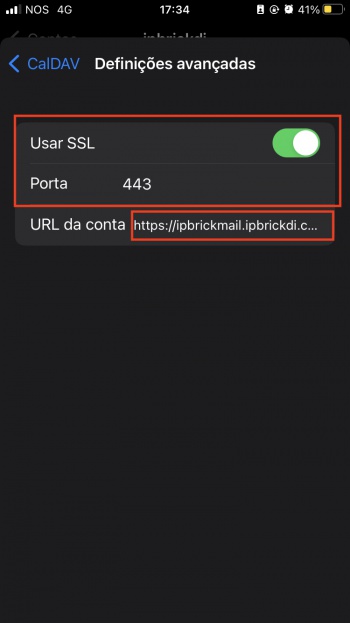
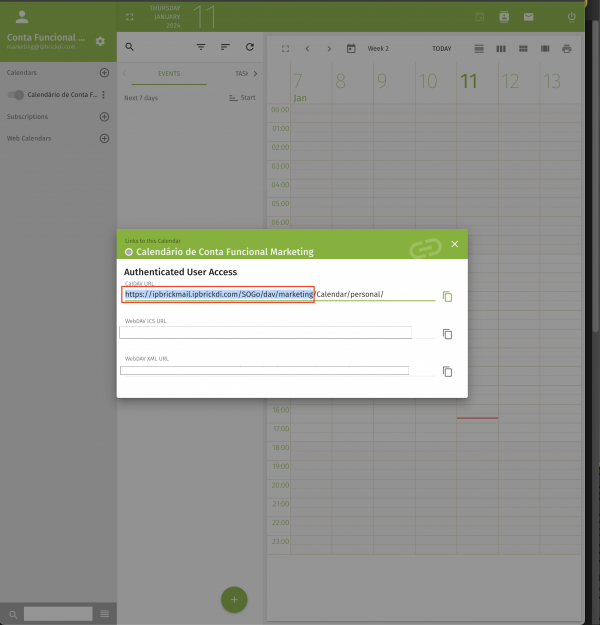
To fill in the "Account URL" input field, you need to access IPBRICK MAIL in your browser and follow the following steps.
In the top bar select the calendar icon

Open the following submenu
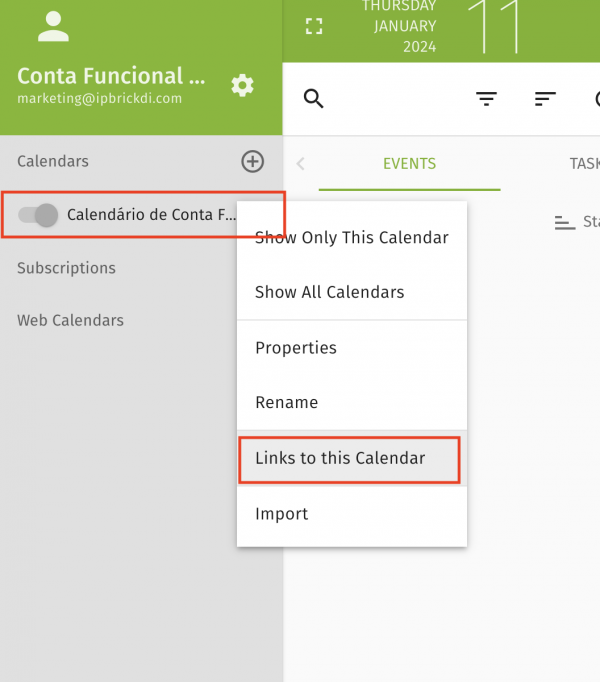
Copy the CalDAV URL only up to your username. In the example given, up to "marketing".
