Difference between revisions of "Click2call Windows"
(→Installing the TAPI Clien) |
|||
| (2 intermediate revisions by 2 users not shown) | |||
| Line 25: | Line 25: | ||
[[File:Click2call2.png| center|1250px]] | [[File:Click2call2.png| center|1250px]] | ||
| + | |||
=== Windows Configurations for Outlook, using the modem feature === | === Windows Configurations for Outlook, using the modem feature === | ||
| − | ==== Installing the TAPI | + | ==== Installing the TAPI Client ==== |
Download ActivaTSP [http://sourceforge.net/projects/activa/files/]. | Download ActivaTSP [http://sourceforge.net/projects/activa/files/]. | ||
Open the Zip file and install "SetupActiva.exe" in the folder ''Activa''. This configuration will ask for details of the server. | Open the Zip file and install "SetupActiva.exe" in the folder ''Activa''. This configuration will ask for details of the server. | ||
| − | |||
==== ActivaTSP Configuration ==== | ==== ActivaTSP Configuration ==== | ||
| Line 88: | Line 88: | ||
* Execute the program and proceed to its installation; | * Execute the program and proceed to its installation; | ||
| − | * After installing, go to the configuration menu and perform the following configurations (see | + | * After installing, go to the configuration menu and perform the following configurations (see images). |
| Line 97: | Line 97: | ||
| − | This configuration allows us to select the number in any application and click on '''Alt + c''' to make the call. | + | This configuration allows us to select the number, in any application, and click on '''Alt + c''' to make the call. |
| Line 155: | Line 155: | ||
| − | All we have to do it's modify the login and password. | + | All we have to do it's modify the IP, login and password. |
In the application, we place the extension. | In the application, we place the extension. | ||
Latest revision as of 12:44, 20 April 2016
Contents
Description
Module for the usage of Click2Call on Windows.
Pages:
- TTTelecom [1]
- Taridium [2]
Necessary configurations
IPBrick Configurations
- Go to IPBrick's Web Interface:
- Advanced Configurations » Telephony » Configurations » IP PBX remote managers » Enable.
- Configure IP PBX remote managers:
- Define the authorized networks and determine a login and password;
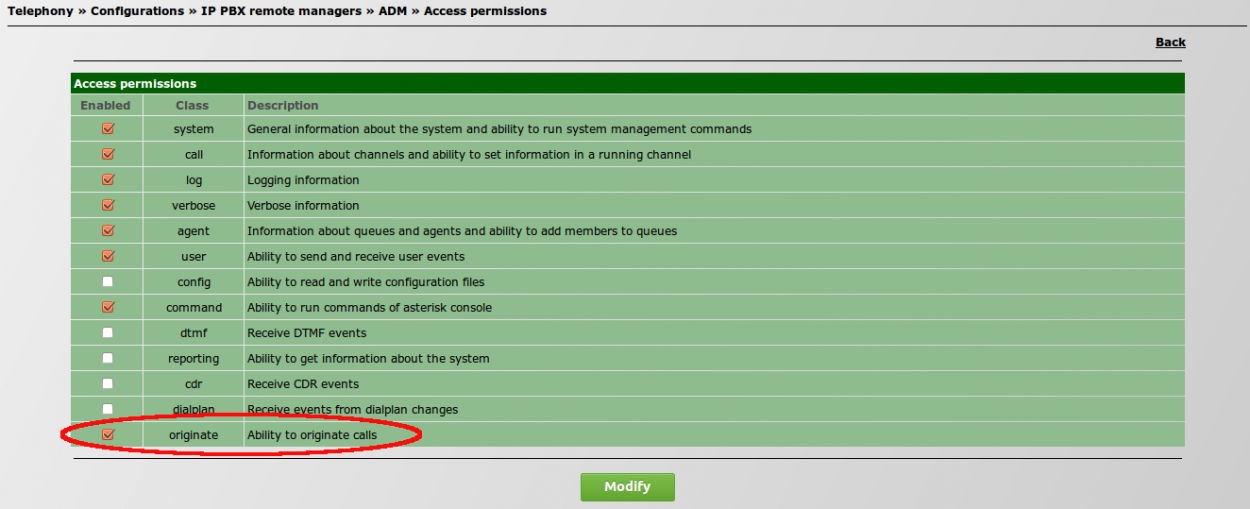
- After creating the remote manager, edit its Access permissions, by selecting the checkbox originate - Ability to originate.
Windows Configurations for Outlook, using the modem feature
Installing the TAPI Client
Download ActivaTSP [3].
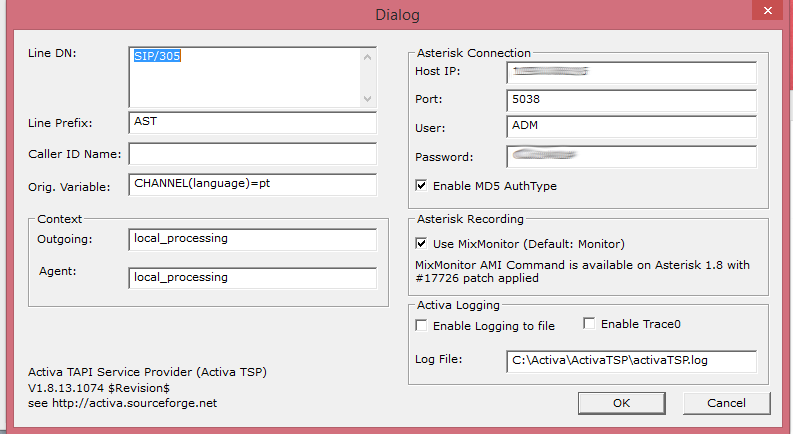
Open the Zip file and install "SetupActiva.exe" in the folder Activa. This configuration will ask for details of the server.
ActivaTSP Configuration
- Line DN: The extension that will be used (E.g.: For the extension 305, enter SIP/305.)
- Line Prefix: AST (default)
- Caller ID Name: Empty
Asterisk Connection
- Host IP: 192.168.19.5 (IPBrick's IP)
- Port: 5038
- User: adm
- Password: <Password>
Context
- Outgoing: local_processing
- Agent: local_processing
Click OK to save configurations. It may be necessary to reboot the PC.
We can always access to this menu on Control Panel » Telephones and modems.
Test the functioning
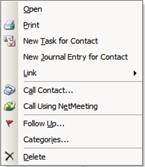
On the contacts of the list view, right-click and make the call.
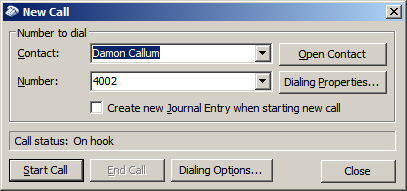
Now click on Start Call.
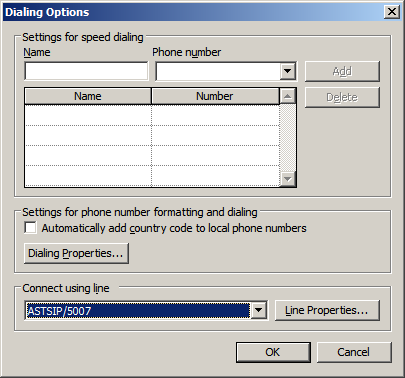
It may be necessary to configure the calling line; to do so, go to the menu Dialing Properties....
Windows configurations, using ADAT
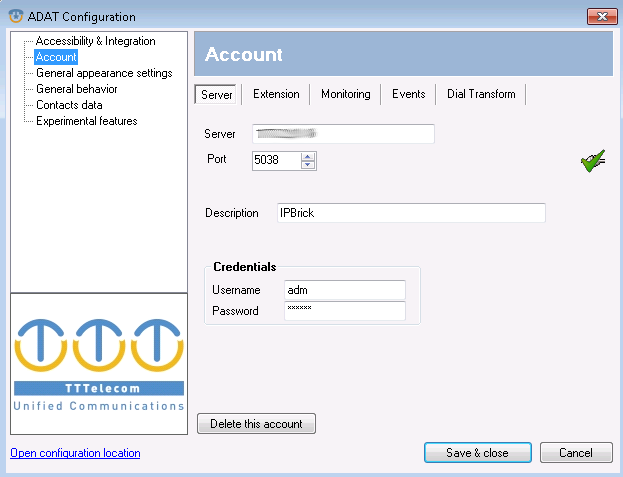
- Link to download ADAT: [4];
- Execute the program and proceed to its installation;
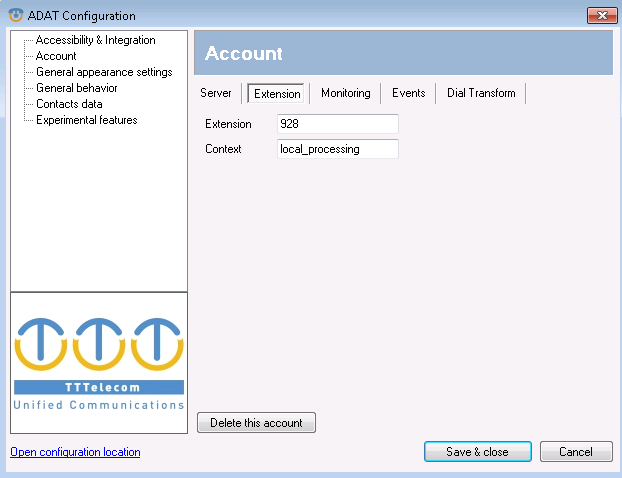
- After installing, go to the configuration menu and perform the following configurations (see images).
This configuration allows us to select the number, in any application, and click on Alt + c to make the call.
Browser support - Google Chrome
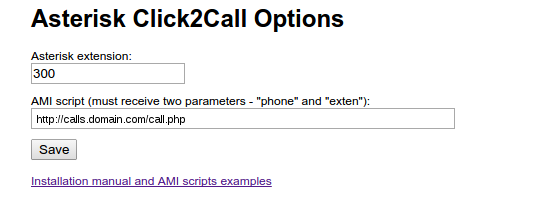
We can use Google Chrome's extension: [5].
We create a site with the following information (for example, calls.domain.com):
cat /home1/_sites/calls/site/call.php
<?if (!empty( $_REQUEST['phone'])   && !empty( $_REQUEST['exten']  ) )
{
        $num = $_REQUEST['phone'];
        $ext = $_REQUEST['exten'];
        $num = preg_replace( "/^\+7/", "8", $num );
        $num = preg_replace( "/\D/", "", $num );

        if ( ! empty( $num ) )
        {
                echo "Dialing $num\r\n";

                $timeout = 10;
                $asterisk_ip = "192.168.19.5";

                $socket = fsockopen($asterisk_ip,"5038", $errno, $errstr, $timeout);
                fputs($socket, "Action: Login\r\n");
                fputs($socket, "UserName: ADM\r\n");
                fputs($socket, "Secret: C3r34l1s#\r\n\r\n");

                $wrets=fgets($socket,128);

                echo $wrets;

                fputs($socket, "Action: Originate\r\n" );
                fputs($socket, "Channel: Local/$ext@local_processing\r\n" );
                fputs($socket, "Exten: $num\r\n" );
                fputs($socket, "Context: local_processing\r\n" );
                fputs($socket, "Priority: 1\r\n" );
                fputs($socket, "Async: yes\r\n" );
                fputs($socket, "WaitTime: 15\r\n" );
                fputs($socket, "Callerid: $ext\r\n\r\n" );

                $wrets=fgets($socket,128);
                echo $wrets;
        }
        else
        {
                echo "Unable to determine number from (" . $_REQUEST['phone'] . ")\r\n";
        }
}
else
{?>Please enter a number to dial.
<?}?>
All we have to do it's modify the IP, login and password.
In the application, we place the extension.

