Difference between revisions of "How to configure a reverse proxy"
| (11 intermediate revisions by the same user not shown) | |||
| Line 3: | Line 3: | ||
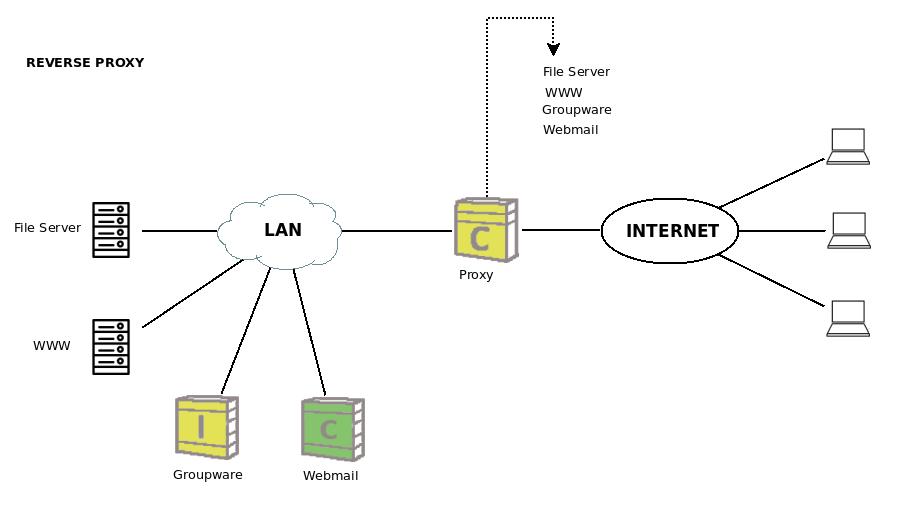
In a scenario where you have an IPBrick configured as a security server and you have an internal web server it is possible to configure IPBrick to act as a reverse proxy. | In a scenario where you have an IPBrick configured as a security server and you have an internal web server it is possible to configure IPBrick to act as a reverse proxy. | ||
| − | The reverse proxy is used in front of the | + | The reverse proxy is used in front of the Web server and has the main objective of redirecting all connections addressed to various Webservers to be routed through the proxy server. A reverse proxy has the function of dispatching incoming network traffic to various servers and it's totally transparent to the user (he will not know that a proxy is being used). |
| + | The reverse proxy fetches the site from the server where it is lodged and returns it to the user that wants to access it. | ||
| + | |||
| + | [[File:cenario3.1_reverse.jpeg]] | ||
= Configuration = | = Configuration = | ||
| + | |||
| + | The following example will explain step by step how to configure a reverse proxy. | ||
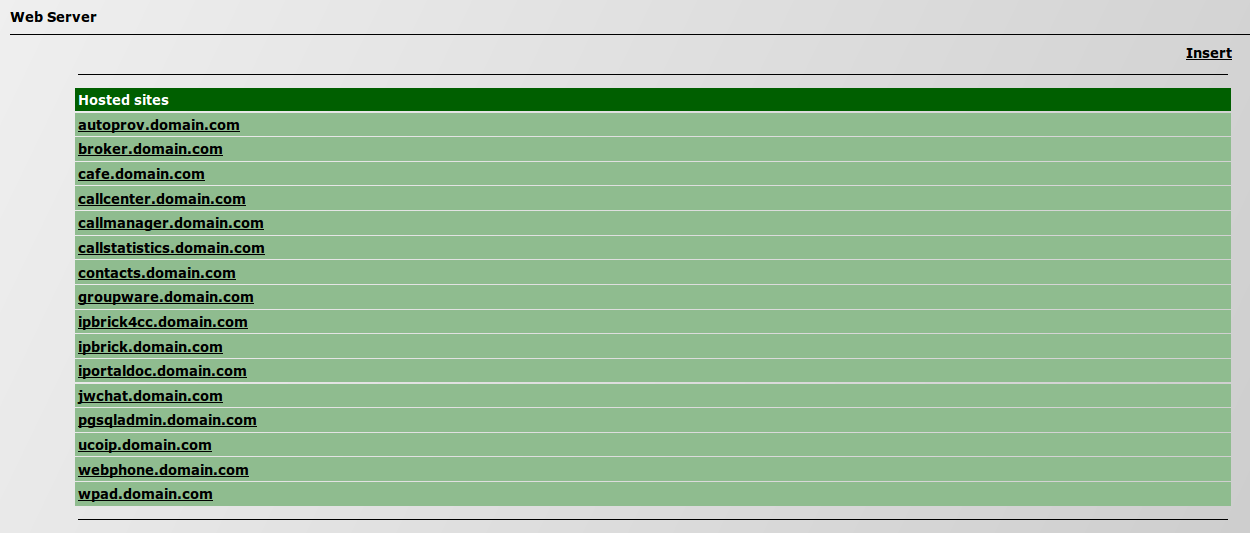
On your IPBrick, go to the menu IPBrick.C and select ''Web Server''. | On your IPBrick, go to the menu IPBrick.C and select ''Web Server''. | ||
| + | |||
| + | [[File:hostedsites.png]] | ||
| + | |||
| + | Then, select the site, from the list, for which you wish to configure a reverse proxy. | ||
| + | |||
| + | '''Note:''' It is also possible to insert other sites. | ||
| + | |||
| + | [[File:websitedefinitions.png]] | ||
| + | |||
| + | Click on the option ''Reverse Proxy''. | ||
| + | |||
| + | [[File:reverseproxyalias.png]] | ||
| + | |||
| + | Click on ''Insert''. | ||
| + | |||
| + | [[File:insertreverseproxy.png]] | ||
| + | |||
| + | ''Proxy Alias'': insert the web address of the site you wish to access (public DNS); | ||
| + | |||
| + | ''URL'': insert the correspondent address of the site on the server of the LAN (internal DNS). | ||
| + | |||
| + | |||
| + | == Practical examples == | ||
| + | |||
| + | 1) If the public DNS is http://groupware.ipbrick.com, just insert it on ''Proxy Alias'' and on ''URL'' insert the internal DNS. With this configuration you're allowing full access to groupware's site. | ||
| + | |||
| + | [[File:groupwarereverse.png]] | ||
| + | |||
| + | '''Note:''' The internal DNS may be or not the same as the public DNS. | ||
| + | |||
| + | |||
| + | 2) If you just want to allow access to a certain page of groupware's site, then you should configure it with the public DNS for that specific page; this way, the user will not be able to access to other pages of groupware's site besides that one. | ||
| + | |||
| + | [[File:groupwarewebmailreverse.png]] | ||
| + | |||
| + | '''Note:''' It is possible to configure more than one reverse proxy for a hosted site; this way, access to more than one page may be provided, but not to the entire site. | ||
Latest revision as of 11:10, 24 September 2015
- * * * THIS PAGE IS UNDER CONSTRUCTION * * *
In a scenario where you have an IPBrick configured as a security server and you have an internal web server it is possible to configure IPBrick to act as a reverse proxy.
The reverse proxy is used in front of the Web server and has the main objective of redirecting all connections addressed to various Webservers to be routed through the proxy server. A reverse proxy has the function of dispatching incoming network traffic to various servers and it's totally transparent to the user (he will not know that a proxy is being used).
The reverse proxy fetches the site from the server where it is lodged and returns it to the user that wants to access it.
Configuration
The following example will explain step by step how to configure a reverse proxy.
On your IPBrick, go to the menu IPBrick.C and select Web Server.
Then, select the site, from the list, for which you wish to configure a reverse proxy.
Note: It is also possible to insert other sites.
Click on the option Reverse Proxy.
Click on Insert.
Proxy Alias: insert the web address of the site you wish to access (public DNS);
URL: insert the correspondent address of the site on the server of the LAN (internal DNS).
Practical examples
1) If the public DNS is http://groupware.ipbrick.com, just insert it on Proxy Alias and on URL insert the internal DNS. With this configuration you're allowing full access to groupware's site.
Note: The internal DNS may be or not the same as the public DNS.
2) If you just want to allow access to a certain page of groupware's site, then you should configure it with the public DNS for that specific page; this way, the user will not be able to access to other pages of groupware's site besides that one.
Note: It is possible to configure more than one reverse proxy for a hosted site; this way, access to more than one page may be provided, but not to the entire site.


