Difference between revisions of "IPBrick Groupware - Microsoft Outlook"
From wiki.IPBRICK.COM
(→Set up a CalDav account in MS Outlook) |
|||
| (9 intermediate revisions by the same user not shown) | |||
| Line 14: | Line 14: | ||
= Set up a CalDav account in MS Outlook = | = Set up a CalDav account in MS Outlook = | ||
| + | |||
| + | Search for "caldavsynchronizer download" and download, extract the file and execute the "CalDavSynchronizer.Setup". | ||
| + | https://github.com/aluxnimm/outlookcaldavsynchronizer/releases/download/v4.4.1/OutlookCalDavSynchronizer-4.4.1.zip | ||
| + | |||
| + | Once done, open Outlook and click on the CalDav Synchronizer tab and then click on Synchronization Profiles. | ||
| + | |||
| + | [[File:Caldavoutlook.png|1100px]] | ||
| + | |||
| + | Click on the "+" button, select the "Sogo" option and click "Ok". | ||
| + | |||
| + | [[File:SelectSogo.png|500px]] | ||
| + | |||
| + | Now do the following instructions: | ||
| + | |||
| + | [[File:Caldavoutlook4.png|500px]]<br> | ||
| + | 1- Choose a Calendar name; | ||
| + | 2- Choose the option "calendar (on this computer only)"; | ||
| + | 3- Enter the DAV URL. To find the DAV URL you need to go to IPBrickMail as shown in the image below:<br> | ||
| + | [[File:CaldavoutlookSogo.png|1100px]]<br> | ||
| + | 4- Click on the "Show Advanced Settings" button; | ||
| + | 5- Set your Username and Password. Then active the option "Use IMAP/POP3 account password"; | ||
| + | 6- Set your Email address; | ||
| + | 7- Click on "Get IMAP/POP3 account settings"; | ||
| + | 8- Click "Test or discover settings" and you will be able to select the calendar, as shown in the image below:<br> | ||
| + | [[File:Caldavoutlook5.png|1000px]]<br> | ||
| + | To add the calendar, click on the desired Calendar, choose the option "Calendar (on this computer only)" and click "Ok".<br> | ||
| + | [[File:CaldavoutlookOptionsPastas.png|350px]]<br> | ||
| + | 9- At "Synchronization interval (minutes)" select "5"; | ||
| + | 10- Click on "Ok" button. | ||
| + | |||
| + | Now you have your calendar in Outlook. | ||
Latest revision as of 12:59, 19 April 2024
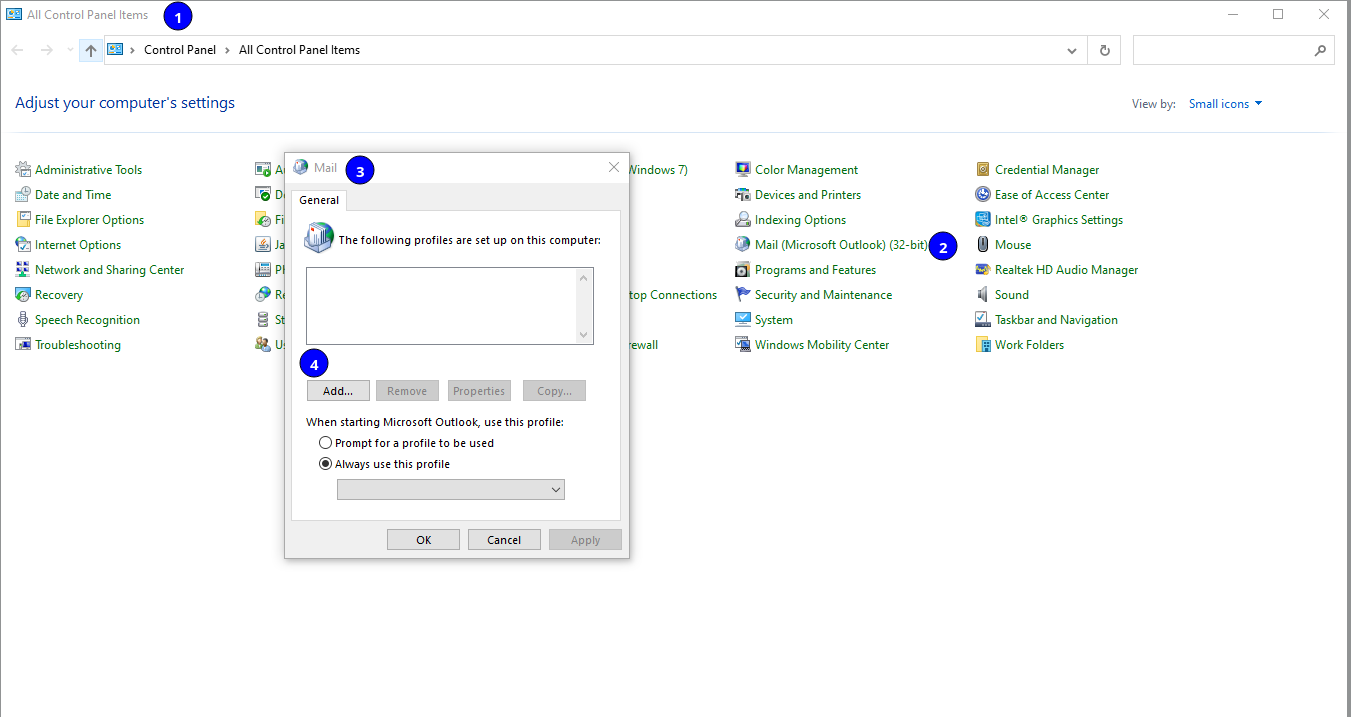
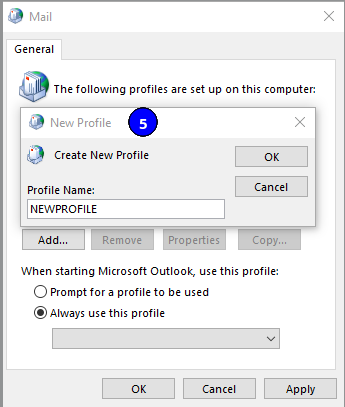
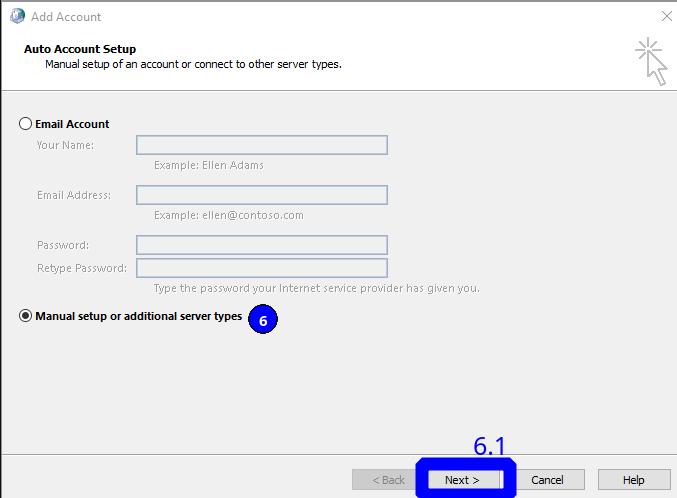
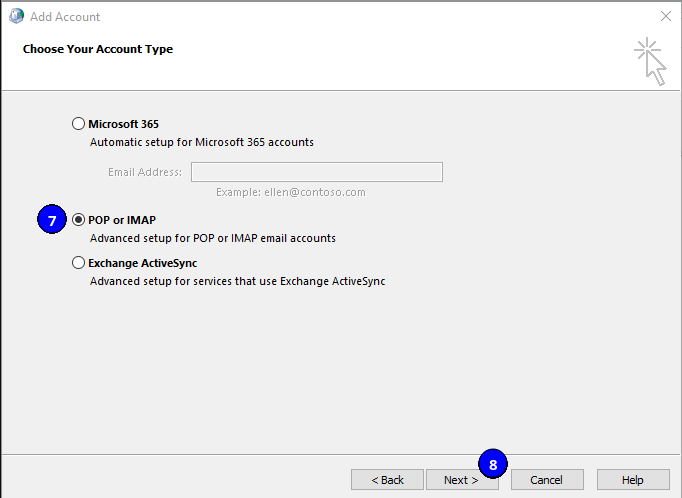
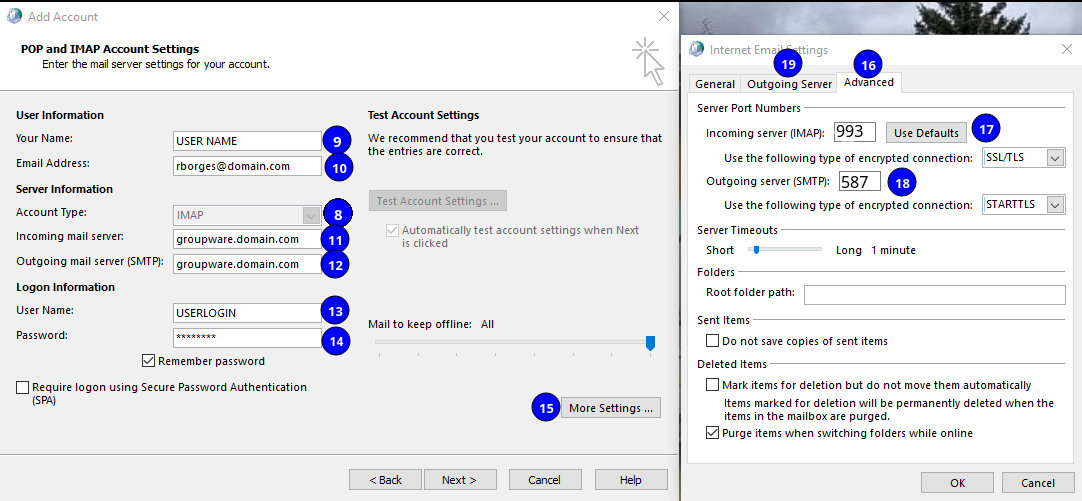
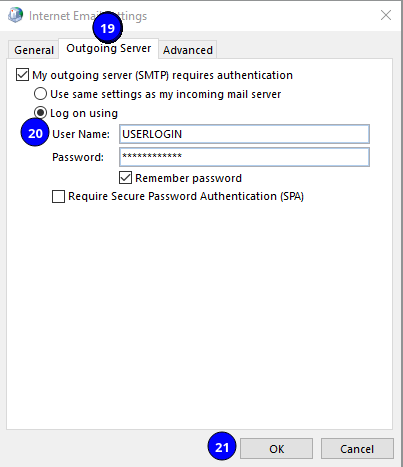
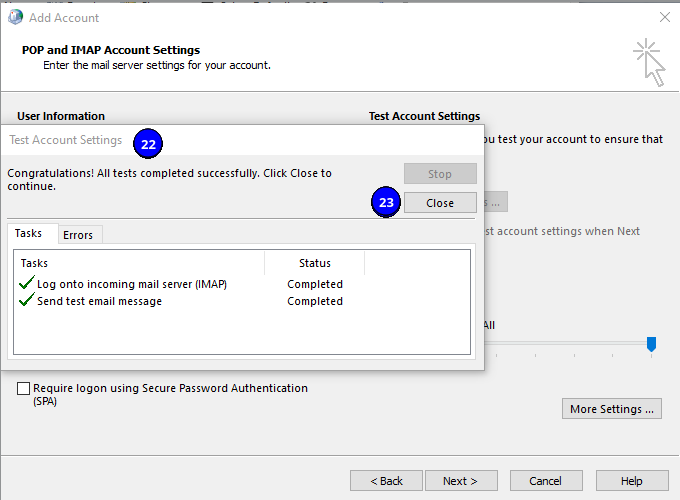
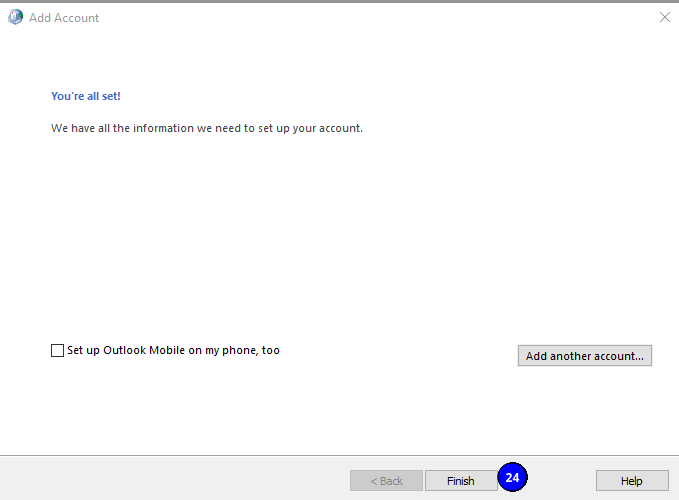
Configure an IMAP account in MS Outlook
Set up a CalDav account in MS Outlook
Search for "caldavsynchronizer download" and download, extract the file and execute the "CalDavSynchronizer.Setup". https://github.com/aluxnimm/outlookcaldavsynchronizer/releases/download/v4.4.1/OutlookCalDavSynchronizer-4.4.1.zip
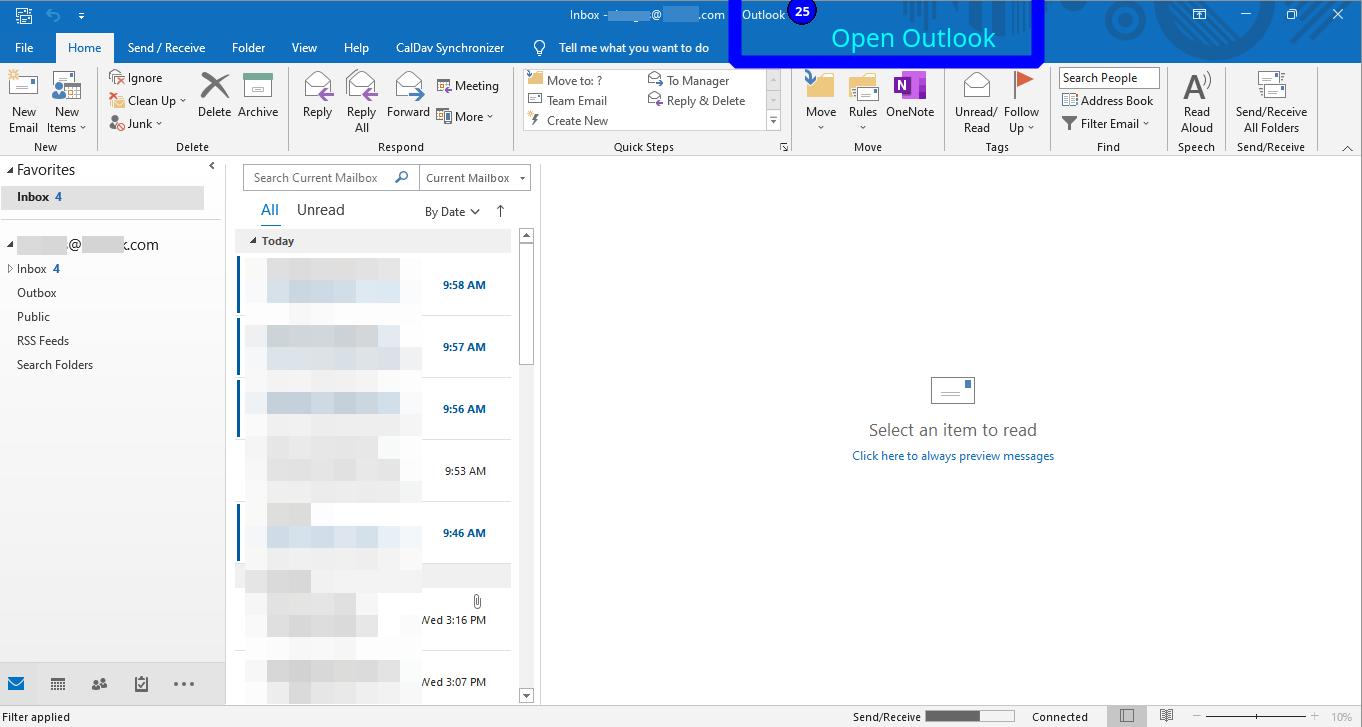
Once done, open Outlook and click on the CalDav Synchronizer tab and then click on Synchronization Profiles.
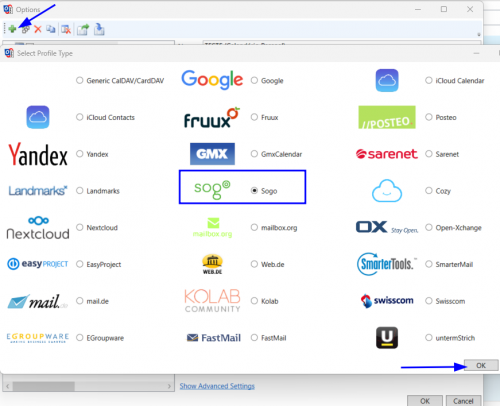
Click on the "+" button, select the "Sogo" option and click "Ok".
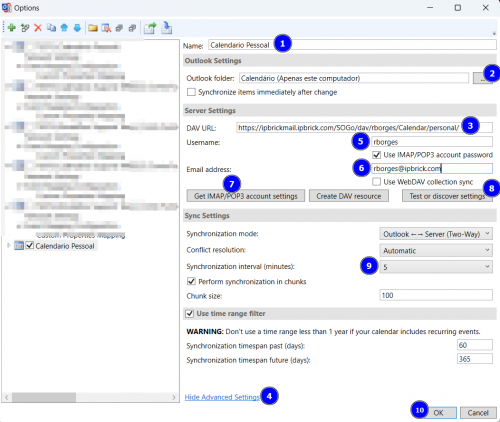
Now do the following instructions:
1- Choose a Calendar name;
2- Choose the option "calendar (on this computer only)";
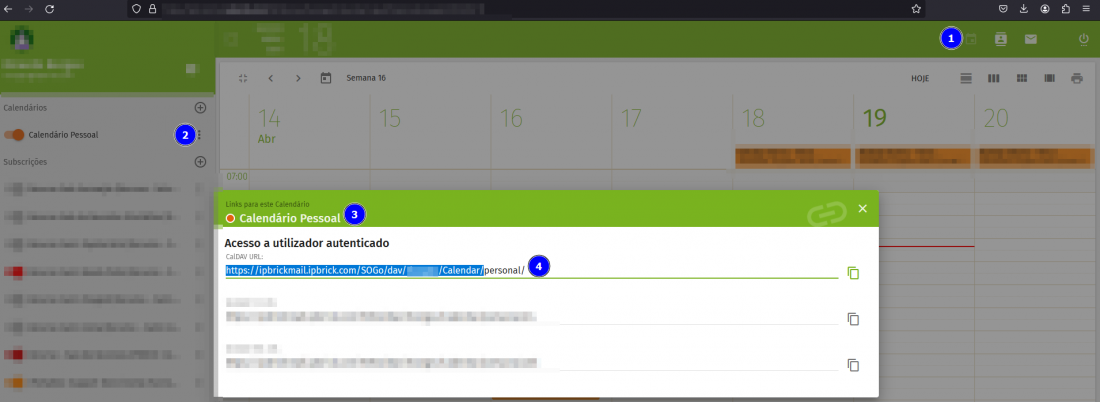
3- Enter the DAV URL. To find the DAV URL you need to go to IPBrickMail as shown in the image below:


4- Click on the "Show Advanced Settings" button;
5- Set your Username and Password. Then active the option "Use IMAP/POP3 account password";
6- Set your Email address;
7- Click on "Get IMAP/POP3 account settings";
8- Click "Test or discover settings" and you will be able to select the calendar, as shown in the image below:


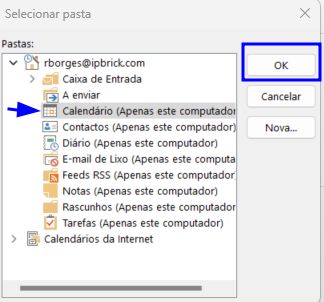
To add the calendar, click on the desired Calendar, choose the option "Calendar (on this computer only)" and click "Ok".


9- At "Synchronization interval (minutes)" select "5";
10- Click on "Ok" button.
Now you have your calendar in Outlook.
