Difference between revisions of "IPBrick - Webmail Templates"
From wiki.IPBRICK.COM
(Created page with "'''* * How to make templates on IPBrickMail * *''' <br> Access to IPBrickMail (ipbrickmail.domain.com).<br> 900px Click on pencil button...") |
|||
| (4 intermediate revisions by the same user not shown) | |||
| Line 3: | Line 3: | ||
Access to IPBrickMail (ipbrickmail.domain.com).<br> | Access to IPBrickMail (ipbrickmail.domain.com).<br> | ||
| − | [[File:Interfaceipbrickmail3.png|900px]] | + | [[File:Interfaceipbrickmail3.png|900px]] <br> |
| − | Click on pencil button and then | + | Click on pencil button and then "Write a message". <br> |
| − | [[File:writemessage.png|170px]] | + | [[File:writemessage.png|170px]] <br> |
| + | |||
| + | Then type the subject and message you want to appear in the template. At the end, click on the save button. <br> | ||
| + | |||
| + | [[File:writemessage2.png|500px]] <br> | ||
| + | |||
| + | Once the template is created, go to the Drafts folder and select the file and move it to the Templates folder. <br> | ||
| + | |||
| + | [[File:TemplateFile.png|1100px]] <br> | ||
| + | |||
| + | If you don't have the templates folder, do the following: <br> | ||
| + | |||
| + | 1 -click on the 3 dots menu; <br> | ||
| + | [[File:Menu3pontos.png|600px]] <br> | ||
| + | 2- Choose the New Folder option; <br> | ||
| + | [[File:Newfolder.png|500px]] <br> | ||
| + | 3- Name the new foilder as Templates; <br> | ||
| + | [[File:Templatesname.png|800px]] <br> | ||
| + | 4- Select the Templates folder you created and click the 3 dots button; <br> | ||
| + | [[File:Template3pontos.png|600px]] <br> | ||
| + | 5- And finally, select the option Set as Templates. <br> | ||
| + | [[File:SetTemplates.png|400px]] | ||
| + | |||
| + | Now click on the Templates file, select the template and click on "Create new draft with this template". | ||
| + | |||
| + | [[File:Createnewdraft.png|1000px]] | ||
| + | |||
| + | You can now send emails using the template you created. | ||
| + | |||
| + | [[File:TemplateMessage.png|700px]] | ||
Latest revision as of 09:44, 14 June 2024
* * How to make templates on IPBrickMail * *
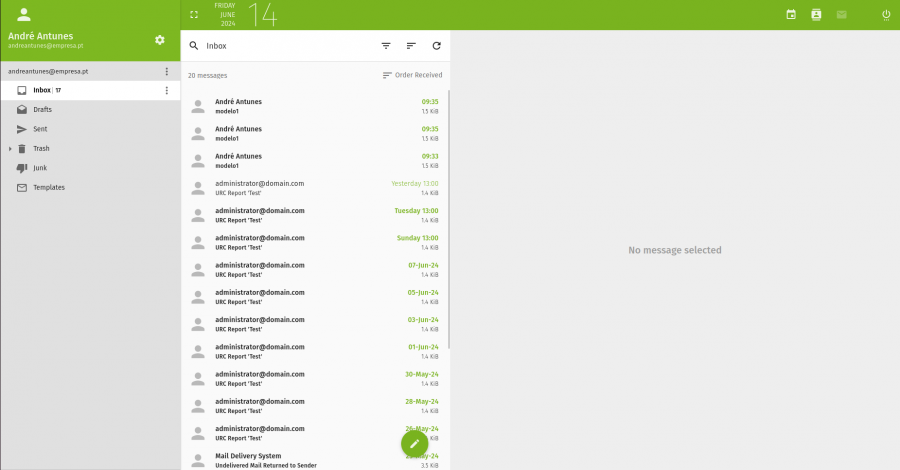
Access to IPBrickMail (ipbrickmail.domain.com).
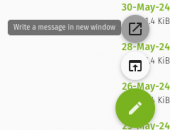
Click on pencil button and then "Write a message".
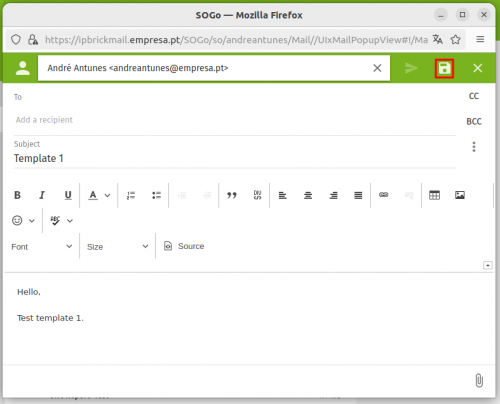
Then type the subject and message you want to appear in the template. At the end, click on the save button.
Once the template is created, go to the Drafts folder and select the file and move it to the Templates folder.
If you don't have the templates folder, do the following:
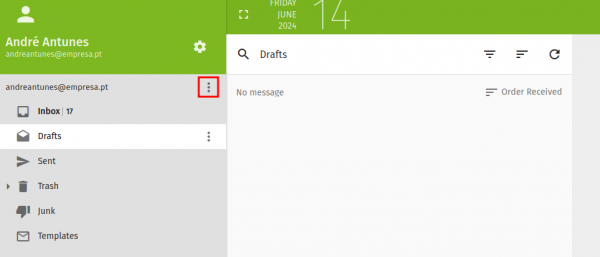
1 -click on the 3 dots menu;
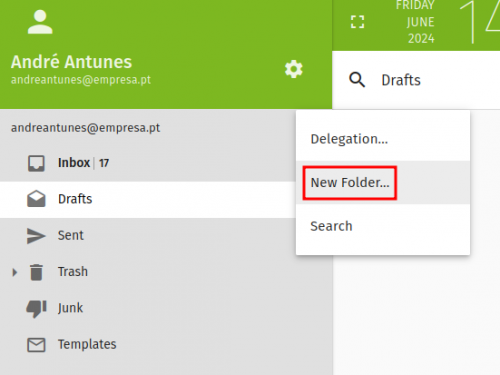
2- Choose the New Folder option;
3- Name the new foilder as Templates;

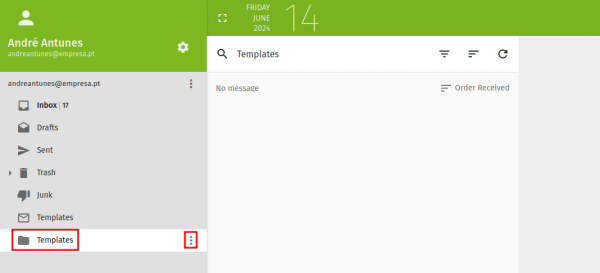
4- Select the Templates folder you created and click the 3 dots button;
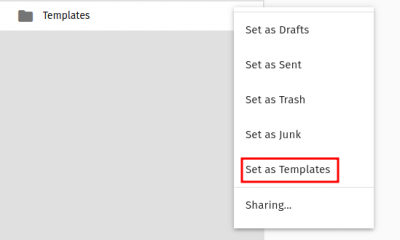
5- And finally, select the option Set as Templates.
Now click on the Templates file, select the template and click on "Create new draft with this template".
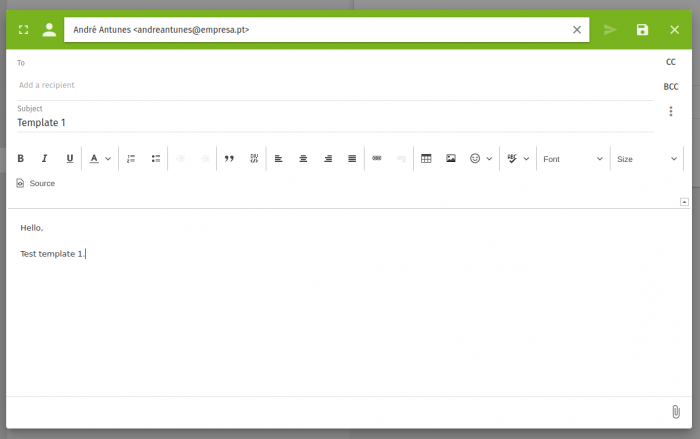
You can now send emails using the template you created.
